Scouting Forms
A form is the layout of a scouting report: which sections it has, which pests and questions are in each section, and what order they come in. Build forms for the way you scout. For example, a wheat in-crop form that checks wheat midge and wheat stem sawfly on every field, or an early-season weed survey.
Every organization has the built-in Standard form (Field Condition, Observations, Comments and Product Recommendations). Nothing changes for your scouts until you build your own forms.
Forms are created and edited in the web app. On phones, Settings > Forms lists your forms, and tapping one shows a preview. Forms are saved on the phone, so they work offline like the rest of your reports.
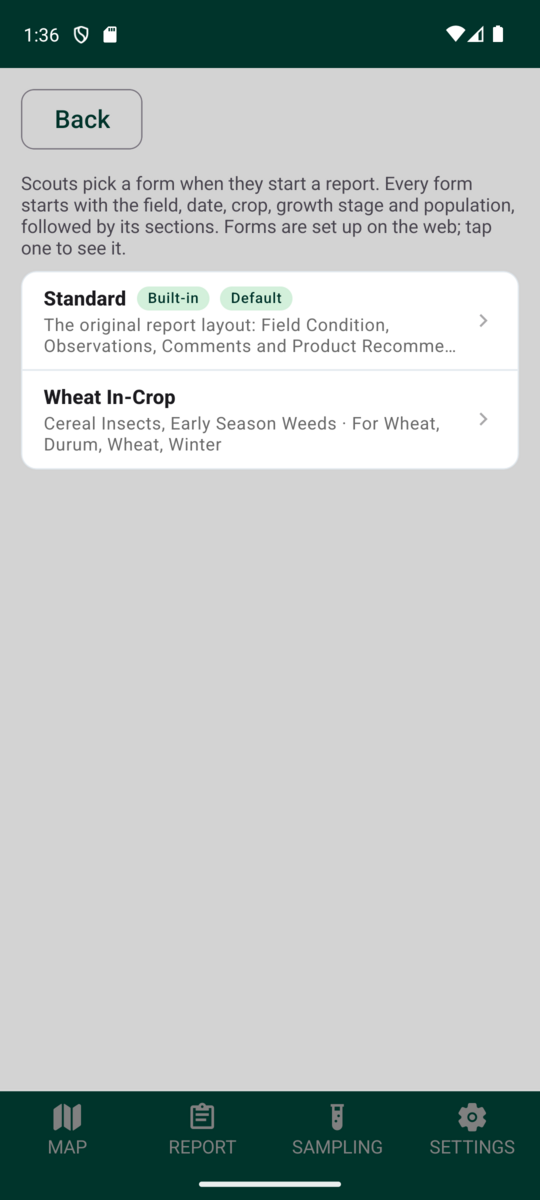
What's on a form
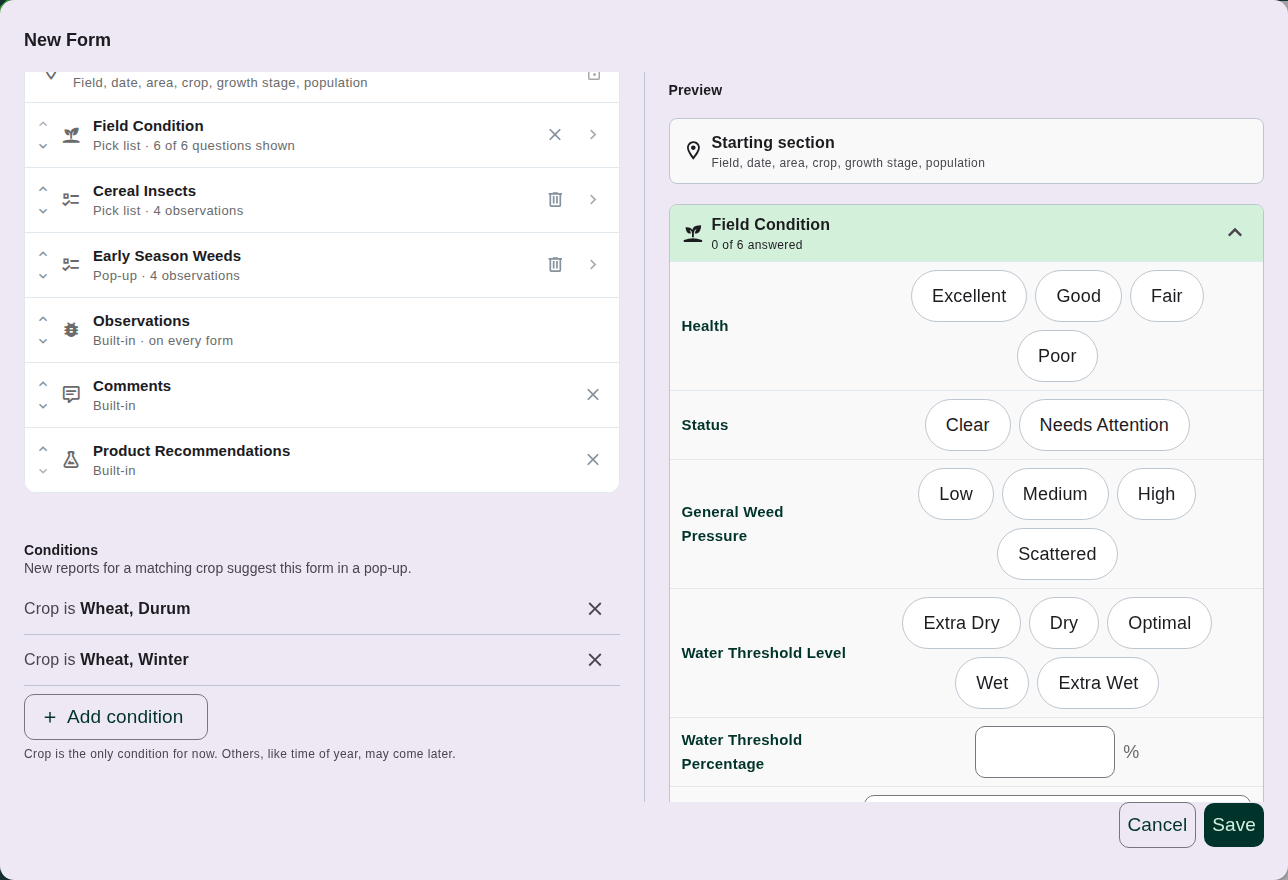
Every form starts with the Starting section (field, date, area, crop, growth stage and population), followed by its sections in the order you choose:
- Field Condition - questions about the field itself, like health, status and water level. You choose which questions the form shows.
- Your sections - groups of weeds, insects, diseases or general observations that the scout checks, each with its questions.
- Observations - always included, so the scout can add anything that isn't on the form.
- Comments and Product Recommendations - optional on custom forms.
Creating a form
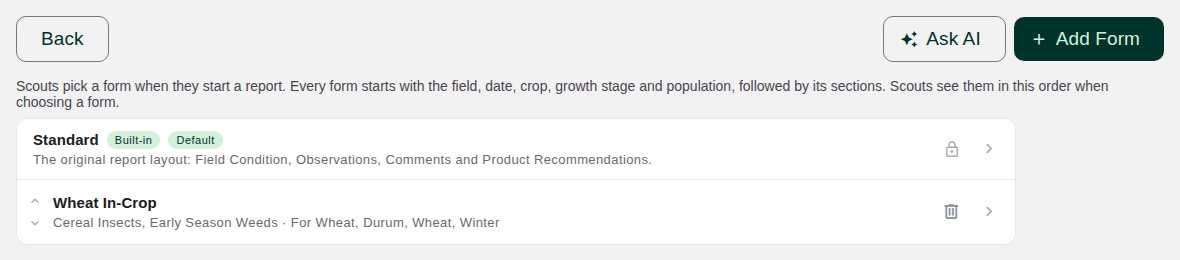
- In the web app, go to Settings > Forms.
- Click Add Form.
- Enter a Form Name, e.g. "Wheat In-Crop".
- Click Add next to Sections, then New section to build a section (see below). Use the arrows to reorder sections, or remove the ones this form doesn't need.
- Optionally, add a crop condition (see Matching forms to crops).
- Check the Preview on the right. It shows the report exactly as scouts will see it.
- Click Save.
Default form
Turn on Default form to make new reports start on that form, unless another form's crop conditions match. With no default set, the built-in Standard form is used.
Building a section
A section is a group of pests or observations, like "Cereal Insects" or "Early Season Weeds".
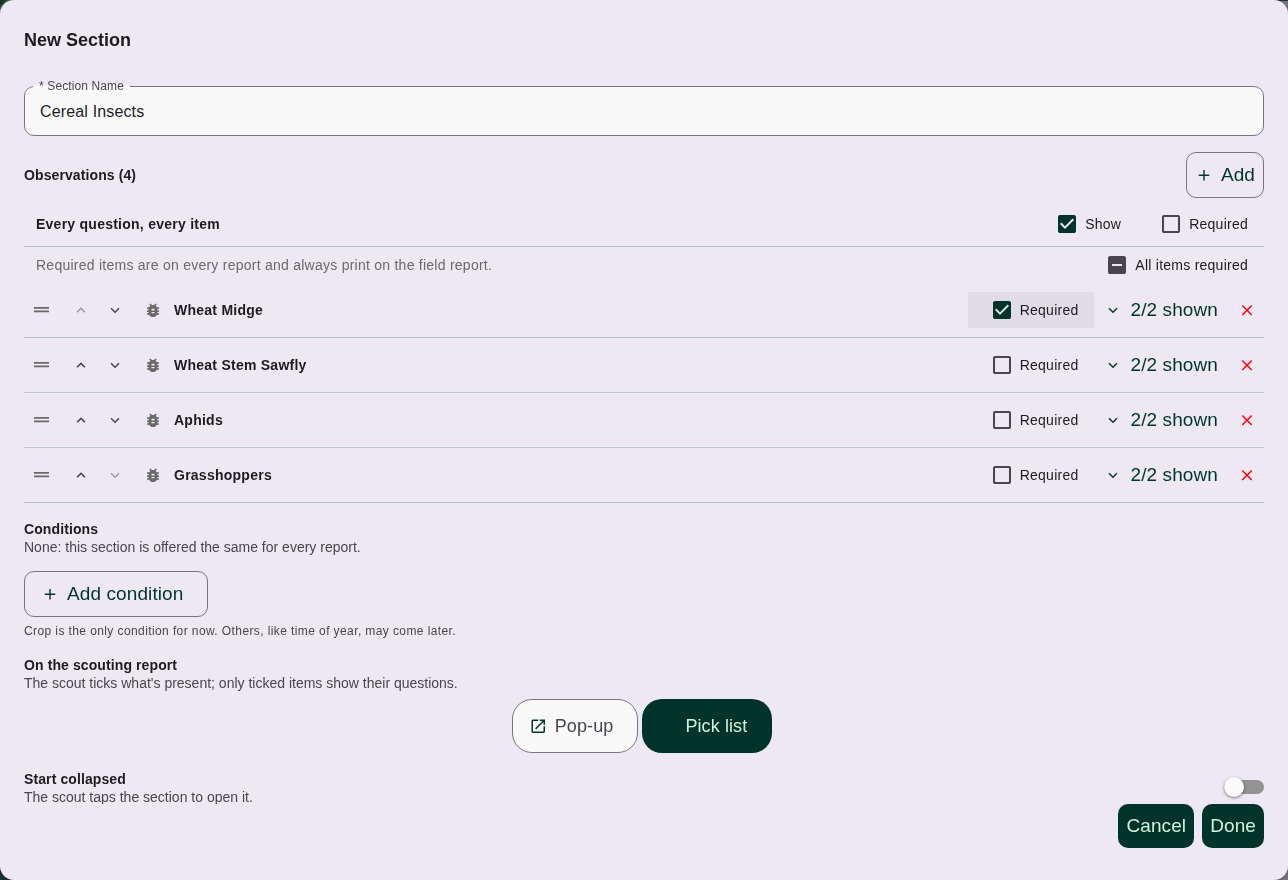
- Enter a Section Name.
- Click Add and pick the pests and observations it covers, then click Done.
- Drag items (or use the arrows) to set the order they show up in.
- For each item, open the questions list (e.g. "2/2 shown") to choose which questions show and which are required.
- Choose how the section appears on the report and on the PDF (below), then click Done.
Required items
Tick Required on an item to put it on every report that uses this form. A required item can't be unticked, and the report can't be submitted until its required questions are answered (saving as a Draft is always allowed). Required items always print on the field report.
Use All items required to require every item in the section, and the Show / Required checkboxes on "Every question, every item" to change all questions at once.
Pick list or pop-up
Under On the scouting report, choose how the section looks:
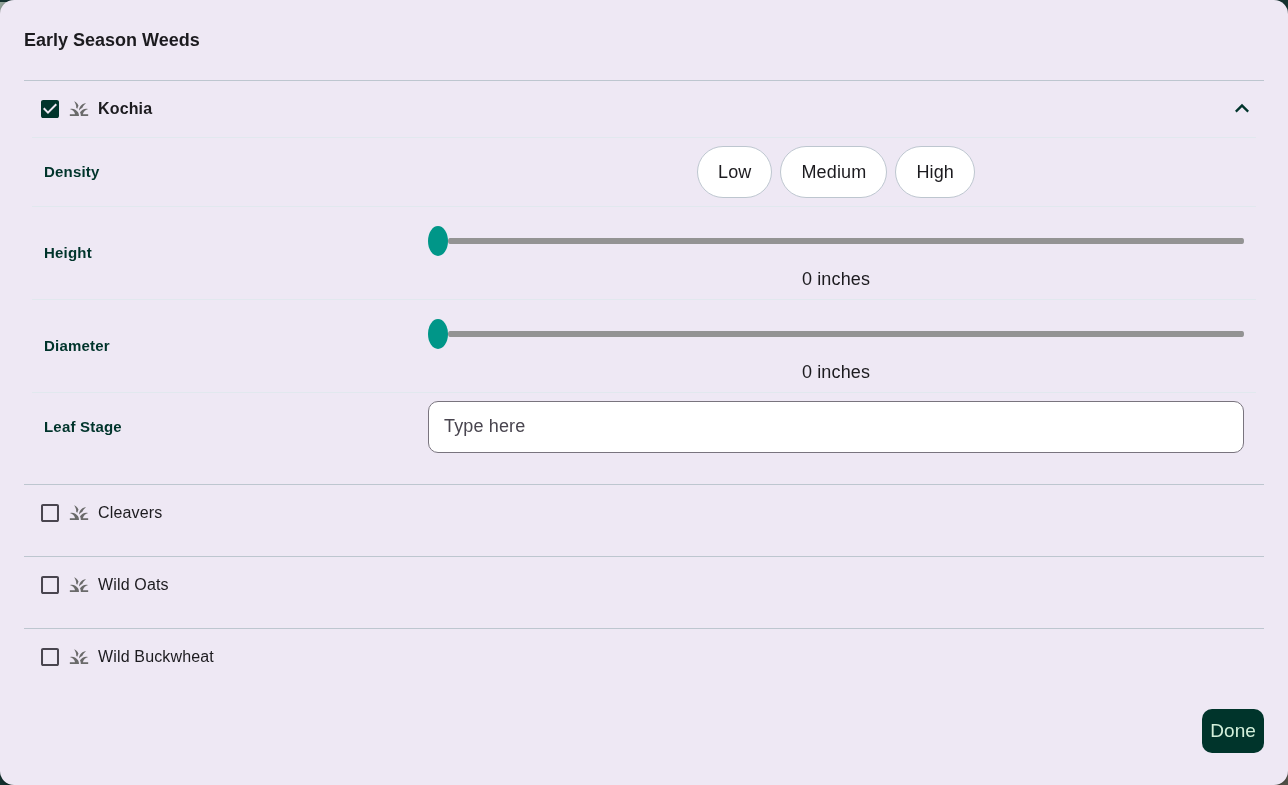
- Pick list - the items are listed right on the report. The scout ticks what's present, and only ticked items show their questions.
- Pop-up - the section is one row on the report, and tapping it opens the list in a pop-up. Good for keeping long reports short.
Turn on Start collapsed to have the section closed until the scout taps it.
Printing on the field report PDF
Under On the field report PDF, choose:
- In Observations - printed with everything else in the report's Observations box.
- Own section - printed as its own box, titled with the section name, with one row per pest.
The PDF follows the form's section order.
Matching forms to crops
Add a crop condition to suggest a form for that crop. Under Conditions, click Add condition and pick the crop. A form can match several crops.
When a scout starts a report on a field with a matching crop, a Choose a Form pop-up suggests the matching forms, with the first one selected. The default form is listed too.
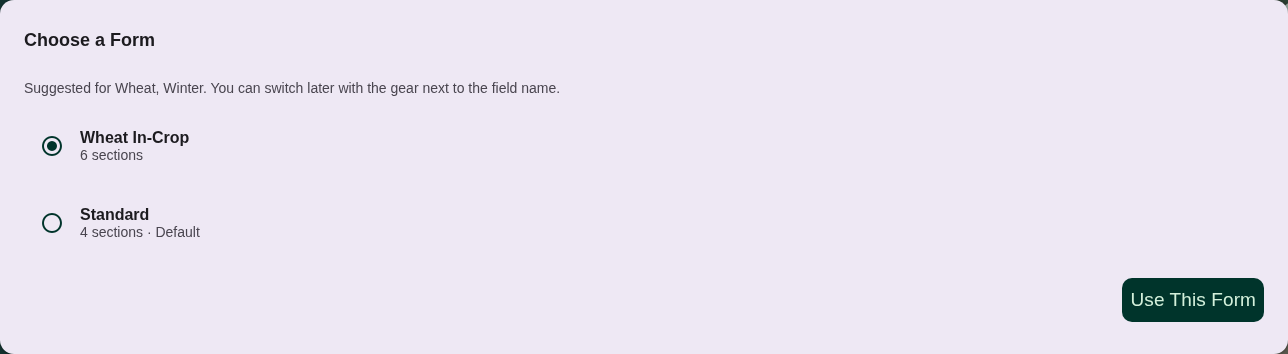
On a phone:
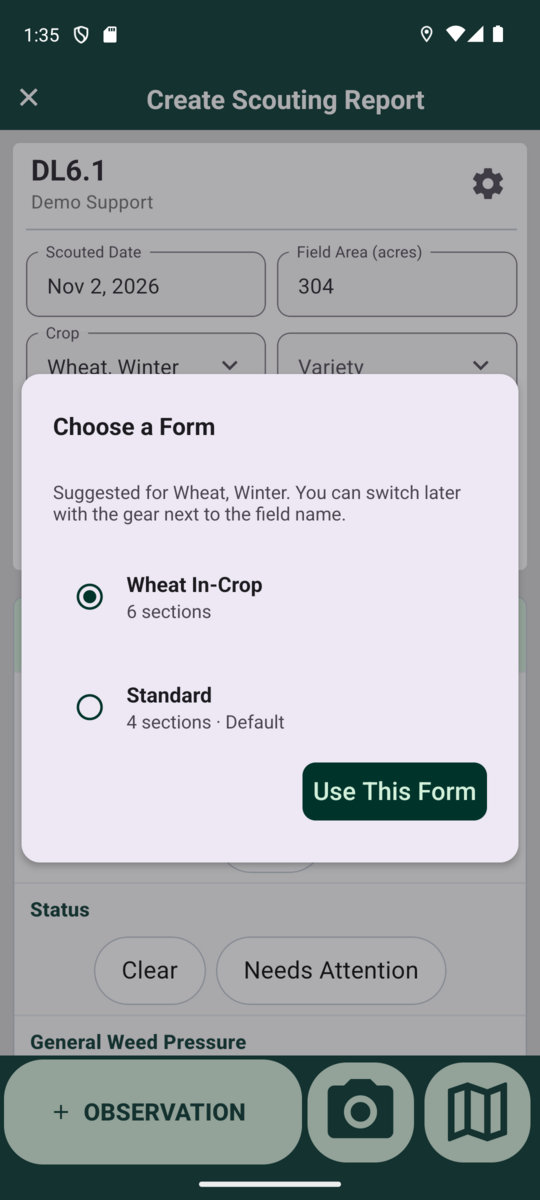
Forms without conditions are used when they're the default, or when the scout picks them.
Using a form on a report
The report shows the form's sections in order:
- Field Condition - tap an answer to pick it; press and hold to clear it. The header shows how many questions are answered.
- Pick lists - tick a pest to mark it as found and open its questions. The header shows how many were found, e.g. "2 of 4 found". Unticking a pest that has answers asks before clearing them.
- Pop-up sections - tap the row to open the list.
- Required pests start ticked and locked, marked "Required".
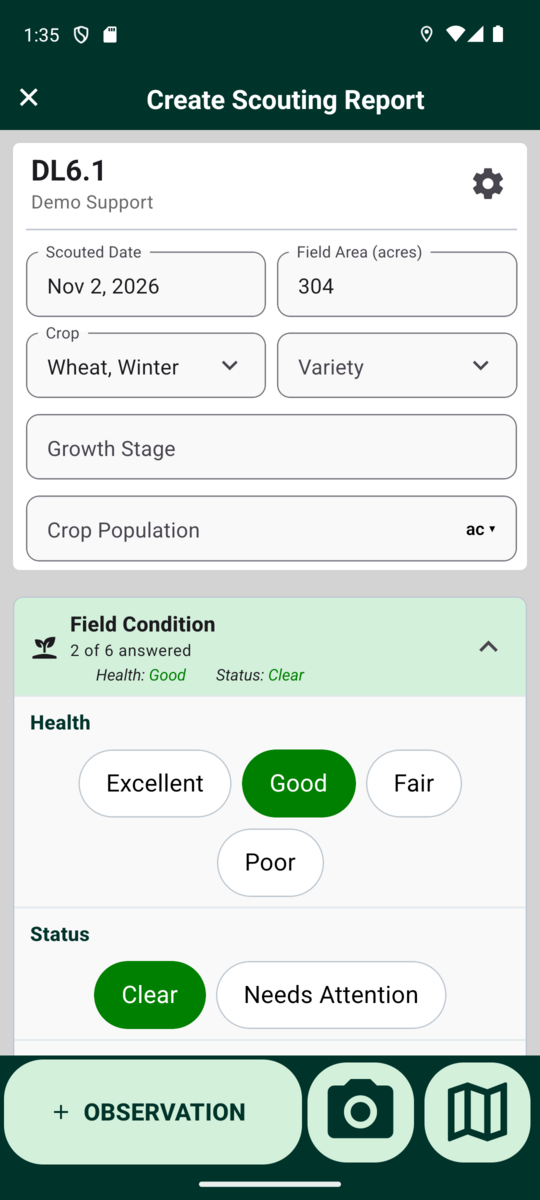
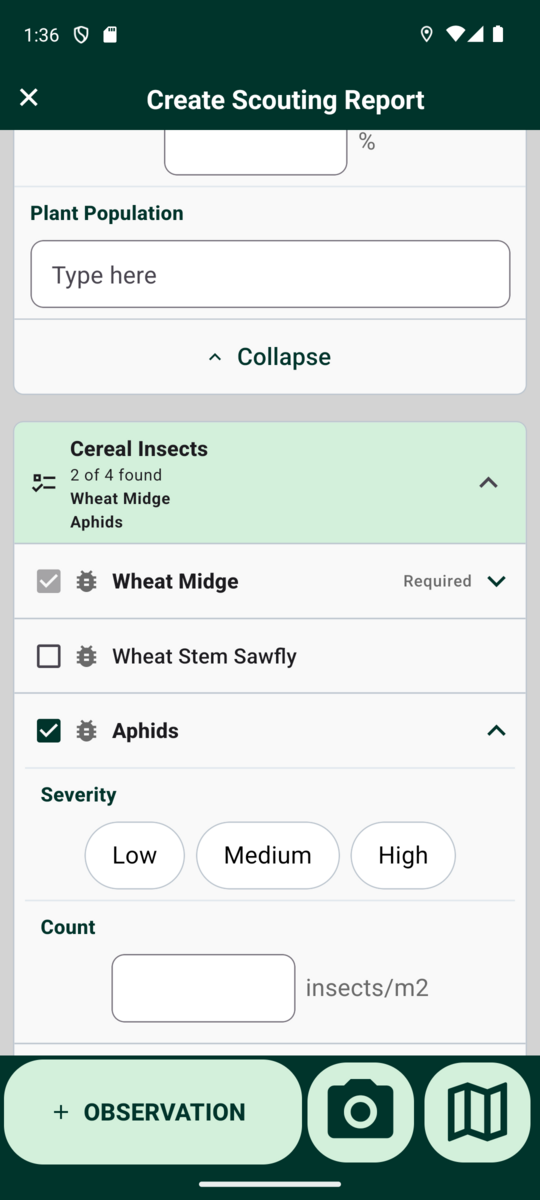
To switch a report to a different form, tap the gear next to the field name.
Ask AI (Beta)
Ask AI drafts a form for you.
- In the web app, go to Settings > Forms and click Ask AI.
- Describe the form: what it's for, which crop, what to check and what to record. Or click Attach File to upload a photo or PDF of the paper form you use today.
- Click Send. Ask AI proposes a form with its sections, pests and questions.
- Review the proposal and click Apply. You can edit the form like any other afterwards.
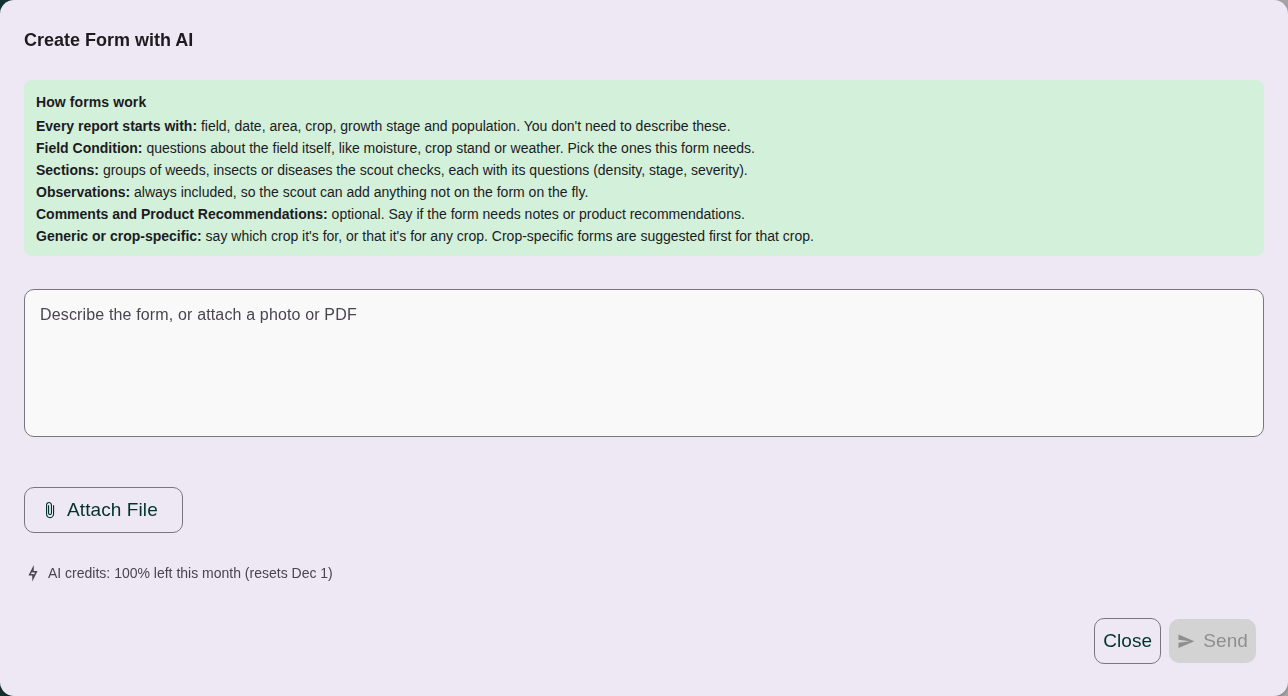
Ask AI is in beta. Each organization gets a monthly allowance of AI credits, shown at the bottom of the window along with when it resets.